

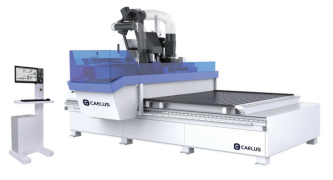
When parts move during CNC nesting, the result is usually obvious: chipped edges, inaccurate dimensions, broken tools, wasted panels, and extra handwork before edge banding or assembly. But the cause is often less obvious. Many furniture factories first blame the cutter, the nesting software, or the CNC Nesting machine itself. In reality, part movement usually happens when the cutting force becomes greater than the workholding force.
For cabinet, wardrobe, and custom furniture production, this is not a small issue. A shifted part can affect hole position, panel size, edge quality, and final assembly accuracy. If the same problem repeats across MDF, plywood, or particleboard jobs, the factory needs more than a quick fix. It needs a clear way to diagnose vacuum, spoilboard condition, tooling, cutting strategy, and machine configuration.
This guide explains why parts move during CNC nesting, how to stop the problem on the shop floor, and what to check when choosing a high-quality wood CNC Nesting machine.
Quick Answer: Why Do Parts Move During CNC Nesting?
Parts move during CNC nesting because the vacuum hold-down force is no longer strong enough to resist the side pressure, upward pull, vibration, or final breakout force created by the cutting tool. The most common reasons are vacuum leakage, worn spoilboards, dust between the panel and table, small part surface area, open vacuum zones, aggressive toolpaths, and unsuitable cutting strategies.
A simple way to think about it is this: Holding force = vacuum pressure × effective contact area.
At sea level, the theoretical maximum atmospheric pressure available for vacuum hold-down is about 14.7 psi. In real production, the usable holding force is always lower because of leakage, material porosity, spoilboard wear, open table areas, and cutouts made during machining. That is why a large cabinet side panel may stay stable, while a small connector, narrow strip, or drawer component shifts near the end of the program.
1. Vacuum Loss Is the Most Common Cause
A CNC nesting table depends on vacuum to hold the panel flat while routing, drilling, grooving, and cutting. When the panel is still whole, vacuum holding is usually strongest. As the program continues, more profiles are cut through the sheet. Each cutout creates another path for air to enter the system. The vacuum pump now has to fight more leakage while the tool is still applying force to the material.
This is why many operators say, "The first half of the sheet cuts well, but small parts move near the end." That timing is a clue. The problem may not be the whole machine; it may be loss of vacuum through the already-cut areas.
What to check:
- Watch the vacuum gauge from the start to the final profile cut.
- Check whether movement happens after several parts have already been released.
- Cover exposed vacuum table areas not covered by the sheet.
- Close unused vacuum zones.
- Inspect hoses, gaskets, filters, and vacuum channels.
A bigger pump is not always the first answer. If the leak path is large, adding more pump capacity may only compensate for wasted airflow. A better first step is to improve sealing and concentrate suction under the active panel area.
2. Small Parts Have Less Holding Area
Small parts are difficult because vacuum hold-down depends heavily on contact area. A large wardrobe panel may have enough surface area to resist cutting force. A small cabinet connector or narrow strip may not.
For example, a 100 mm × 100 mm part has only 10,000 mm² of contact area. A 600 mm × 800 mm cabinet panel has 480,000 mm². Even before considering leakage, the larger panel has 48 times more contact area. Once the small part is nearly separated from the surrounding sheet, there is very little material left to keep it stable.
Parts most likely to move include:
- Small drawer parts
- Narrow filler strips
- Shelf supports
- Toe-kick components
- Small cabinet connectors
- Thin decorative panels
- Parts located near the edge of the sheet
For these parts, vacuum alone may not be enough. The CAM strategy must help the machine hold the part until the final pass is complete.
3. Dust and Chips Break the Vacuum Seal
In wood CNC nesting, MDF dust and chip debris are a constant problem. Even a thin layer of dust between the sheet and the spoilboard can create air gaps. Those gaps reduce the vacuum seal and allow micro-movement during cutting.
This is especially common in factories cutting MDF or particleboard for long shifts. Fine dust can collect on the spoilboard surface, clog vacuum channels, reduce airflow, and make the panel sit unevenly. The machine may still sound normal, but the holding force at the part surface becomes inconsistent.
Practical fixes:
- Vacuum the spoilboard before loading every new sheet.
- Do not rely only on compressed air, which can blow dust into vacuum channels.
- Clean the underside of dusty panels before loading.
- Check filters and pump inlet paths regularly.
- Use automatic pushing and dust-clearing functions where available.
On Caelus CNC nesting solutions, automatic outfeed and pusher functions help reduce manual handling and improve workflow cleanliness. This matters because stable nesting is not only about spindle power; it is also about keeping the panel flat, clean, and well supported throughout the cycle.
4. Worn or Poorly Prepared Spoilboards Reduce Suction
The spoilboard is a working part of the vacuum system. If it is too rough, too porous, too thin, uneven, or heavily scored, vacuum performance drops. Deep tool marks can create air channels. A fuzzy MDF surface can reduce contact quality. Repeated through-cuts can slowly turn the spoilboard into a leakage path.
A well-prepared MDF spoilboard should be flat and open enough for vacuum flow, but not so damaged that it leaks uncontrollably. In many shops, a light fly-cut on both sides of a new MDF spoilboard is used to remove sealed surfaces and improve vacuum flow. A 0.5 mm surfacing cut is a common starting point. However, after repeated jobs, the board must be resurfaced or replaced.
A useful maintenance rule is to track spoilboard condition by sheets processed, not just by calendar days. A factory cutting abrasive melamine-faced panels all day will wear the spoilboard faster than a shop running occasional plywood jobs.
Warning signs include:
- Parts moving only in certain table areas
- Visible deep grooves
- Vacuum level dropping faster than usual
- Good holding on new spoilboard, poor holding after repeated jobs
- Uneven edge quality across the same sheet
5. Tool Pressure Can Push, Pull, or Flip the Part
Even with good vacuum, the cutter still applies force. If the toolpath, feed rate, spindle speed, or cutter geometry is not suitable, parts can move.
Common tool-related causes include:
- Feed rate too high for the part size
- Step-down too deep
- Dull tool increasing side load
- Final pass removing too much material
- Upcut tool pulling small parts upward
- Poor chip evacuation causing heat and vibration
For unstable small parts, a downcut or compression cutter may improve stability, depending on material and edge-quality requirements. A downcut tool pushes material downward, which can help hold small parts against the table. A compression tool is often used in cabinet production because it can improve top and bottom edge quality when the cutting depth and feed are correct.
6. Onion Skinning Helps Preserve Vacuum
Onion skinning means leaving a thin layer of material at the bottom of the cut instead of cutting fully through in one pass. The remaining skin keeps the part attached to the sheet and helps preserve vacuum until the final cleanup pass.
For wood panel nesting, a 0.5–1.0 mm onion skin is a practical starting range. The exact value depends on material thickness, cutter diameter, board flatness, and edge-quality requirements. Thin panels may need less skin. Unstable small parts may need more.
Use onion skinning when:
- Small parts move during final through-cut
- Vacuum drops near the end of the sheet
- Edge quality is inconsistent
- Parts are too small for vacuum alone
- You want to avoid manual tab cleanup
The trade-off is cycle time. Onion skinning usually adds a second pass. But if it prevents scrapped panels, broken cutters, and rework, the total production cost may be lower.
7. Tabs Are Better for Very Small or Narrow Parts
Tabs are small uncut bridges that connect the part to the surrounding sheet. They are very effective for small parts, narrow strips, or components that shift even with onion skinning. The downside is that tabs require manual removal and sanding.
Use tabs when:
- The part is smaller than the operator's palm
- The part is long and narrow
- The part is close to the sheet edge
- Final-pass movement is damaging finished edges
- The job value is high enough to justify extra cleanup
A practical approach is to create CAM rules based on part size. For example, large panels can be cut normally, medium parts can use onion skinning, and very small parts can receive tabs automatically. This is much better than using the same cutting strategy for every part on the sheet.
8. Cut Small Parts While Vacuum Is Strongest
Cutting order matters. If small parts are cut last, they are being machined when the sheet has the most cutouts and the weakest overall vacuum condition. For difficult jobs, small parts should often be cut earlier, while the board still has more continuous surface area and stronger hold-down.
A useful sequence is:
1. Drill and groove first.
2. Rough cut profiles while the panel is stable.
3. Cut small parts before too many large cutouts open.
4. Leave onion skin or tabs where needed.
5. Use a light final pass to release parts cleanly.
This is one of the most overlooked fixes because it does not require new hardware. It requires better CAM discipline.
Troubleshooting Table: Symptom, Cause, Fix
| Symptom | Likely Cause | First Fix |
|---|---|---|
| Small parts move near the end | Vacuum loss through cutouts | Cut small parts earlier; use onion skin |
| Parts lift upward | Tool geometry or poor contact | Try downcut strategy; check spoilboard |
| Edge chipping appears randomly | Micro-movement | Clean bed; reduce final-pass force |
| Vacuum pump runs constantly | Leakage | Seal open zones; inspect hoses and filters |
| Parts move in one table area | Spoilboard damage or zone leakage | Resurface or replace spoilboard |
| Narrow strips shift sideways | Low contact area and side force | Add tabs; reduce step-down |
| First sheets cut well, later sheets fail | Dust buildup | Clean spoilboard and filters per shift |
What to Check When Buying a CNC Nesting Machine
If part movement happens once, it may be a setup issue. If it happens repeatedly across different jobs, the machine configuration should be reviewed.
A production-level wood CNC Nesting machine should have:
- Automatically controlled vacuum zones
- A sealed vacuum chamber
- High-rigidity frame construction
- Stable high-power spindle
- Reliable automatic tool changing
- Automatic tool length measurement
- Dust-clearing and outfeed support
- Software or ERP connectivity for repeatable workflow
Caelus CNC nesting machines are designed for panel furniture production, integrating automatic labelling, drilling, grooving, routing, cutting, and outfeed. For cabinet, wardrobe, and custom furniture manufacturers, this matters because nesting quality depends on the entire workflow—not just the router head.
The Caelus C3LA CNC nesting solution, for example, uses a heavy-duty stress-relieved frame, fully sealed vacuum chamber, 13.2 kW HSK-F63 spindle, 16-position automatic tool changer, 6 auto-controlled vacuum zones, dual high-flow dry vacuum pumps, automatic loading and labelling, and intelligent outfeed. The machine supports panel sizes up to 4200 × 2100 mm, panel thickness from 10–25 mm, and panel unevenness within 0.3 mm.
For shops with different production needs, the Caelus C3A line also offers 13.2 kW milling power, 16-tool changing capacity, automatic tool length measurement, PC control, HMI operation, ERP/user software integration, and remote maintenance support.
Common Mistakes to Avoid
The first mistake is blaming the spindle before checking vacuum. If the panel is not held correctly, even a high-quality spindle cannot prevent movement.
The second mistake is opening all vacuum zones. Vacuum should be focused under the active sheet area, not wasted through uncovered zones.
The third mistake is cutting every part with the same strategy. A large cabinet side panel and a 100 mm connector should not be treated the same.
The fourth mistake is cutting too deeply into the spoilboard. Repeated overcutting creates grooves that become air leakage channels.
The fifth mistake is buying only for speed. A fast CNC Nesting machine that requires constant manual fixing, taping, or rework will not deliver real productivity.
Final Advice
When parts move during CNC nesting, do not look for one single cause. Start with the full chain: vacuum pressure, contact area, spoilboard condition, dust, cutting order, tool geometry, feed rate, tabs, onion skinning, and machine rigidity.
For a furniture factory, the best solution is a combination of good daily habits and the right equipment. Clean the bed. Close unused zones. Maintain the spoilboard. Use onion skinning or tabs for small parts. Review toolpaths before blaming the machine. And when choosing a new CNC Nesting machine, look closely at vacuum design, frame stability, automation, and software integration.
If your factory cuts MDF, plywood, or particleboard for cabinets, wardrobes, or custom furniture, Caelus can help evaluate your panel size, material type, part dimensions, and production volume, then recommend a CNC nesting solution built for stable, accurate, and efficient panel processing.